Sharp PN-60TA3 Uživatelský manuál
Procházejte online nebo si stáhněte Uživatelský manuál pro Monitory Sharp PN-60TA3. Sharp PN-60TA3 User Manual Uživatelská příručka
- Strana / 7
- Tabulka s obsahem
- KNIHY


Shrnutí obsahu
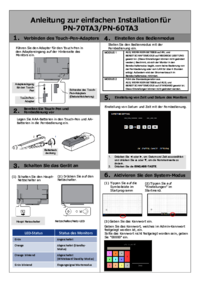
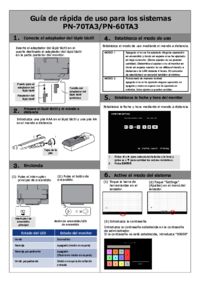
3. Turn on the power Power button/Power LED (1) Turn on the main power switch. Set a AAA battery in the touch pen and the AA battery in the Remote Con
(5) Enter system password. The monitor is automatically restarted in System mode. (4) Touch “System mode” on “System Settings” tab. 7. Date and Time
(2) Select the format. 8. “Region and Language” settings for the Operation System (1) Touch “Region and Language Settings” on “System Settings” tab.
(1) Touch “Language” button. 9. “Language” settings of SHARP Software (2) Select your language. If you select “English”, please select “SHARP Cloud Po
(1) Touch “Printer Settings” button. 11. Printer settings (by using discovery function) (4) Touch “Printer Selection” button. (3)Touch “Settings” tab
(1) Touch “Manually Add >” button. 12. Printer settings (Select printer manually) ex)Model Name (Required):「MX-5111FN」 IP Address (Required):「192.
13. Scanner settings (Network Scanner Tool Lite) (1) Touch “NST-Lite Setup” on “BASIC Setting” tab. (2) Touch “Scanners” tab. (3) Touch “Auto Detect”
Další dokumenty pro Monitory Sharp PN-60TA3






Související produkty a manuály pro Monitory Sharp PN-60TA3
 (9 stránky)
(7 stránky)
(11 stránky)
(4 stránky)
(0 stránky)
(11 stránky)
(9 stránky)
(7 stránky)
(11 stránky)
(4 stránky)
(0 stránky)
(11 stránky)
 (9 stránky)
(59 stránky)
(9 stránky)
(59 stránky)
 (11 stránky)
(9 stránky)
(4 stránky)
(59 stránky)
(0 stránky)
(11 stránky)
(9 stránky)
(4 stránky)
(59 stránky)
(0 stránky)
 (0 stránky)
(0 stránky)
(0 stránky)
© 2020, manymanuals.cz. Všechna práva vyhrazena. | 0.034 s |
 Manymanuals.com
 Manymanuals.de
 Manymanuals.fr
 Manymanuals.it
 Manymanuals.pl
 Manymanuals.cz
 Manymanuals.es
 Manymanuals-pt.com
Komentáře k této Příručce